How to use your domain as a Bluesky handle
Published by James on 19/10/2024In response to some of the recent changes happening over on X (formerly Twitter, which I know everyone knows, but saying X by itself feels incomplete), we recently made the decision to make Bluesky our main social media platform going forward for all things Kinoko and the Cult of Galaxy.
The ongoing downfall of X in the Elon Musk era highlights once again how these platforms – even the social media giants – rise and fall. That’s just one of the reasons why I’m a firm believer that all creators who are serious about their work should be looking to develop their own websites. When you own the platform, you alone get to decide what happens with it. You’re no longer at the mercy of the whims of its owners.
But that’s another topic for another day.
In this blog post, I’m going to explain how you can transform your generic (and unsightly, in this writer’s opinion!) ‘@your-name-here.bsky.social’ Bluesky handle into a shorter, more memorable one which you control. Why do this? Not only does it look better, but it also verifies your identity by connecting your Bluesky account with your brand. More importantly, if you ever move your account to another AT Protocol host, you won’t be obligated to update your handle as you otherwise would.
Interested? Then let’s get started!
Step 1: Purchase a domain name
First, you need to get your hands on a domain name.
If you don’t already know, a domain name is the unique text string that identifies a website on the world wide web and maps to its IP address so that internet browsers can find it. For example, our www.cultofgalaxy.com domain name maps directly to our server so you can punch it into your address bar and find your way back here.
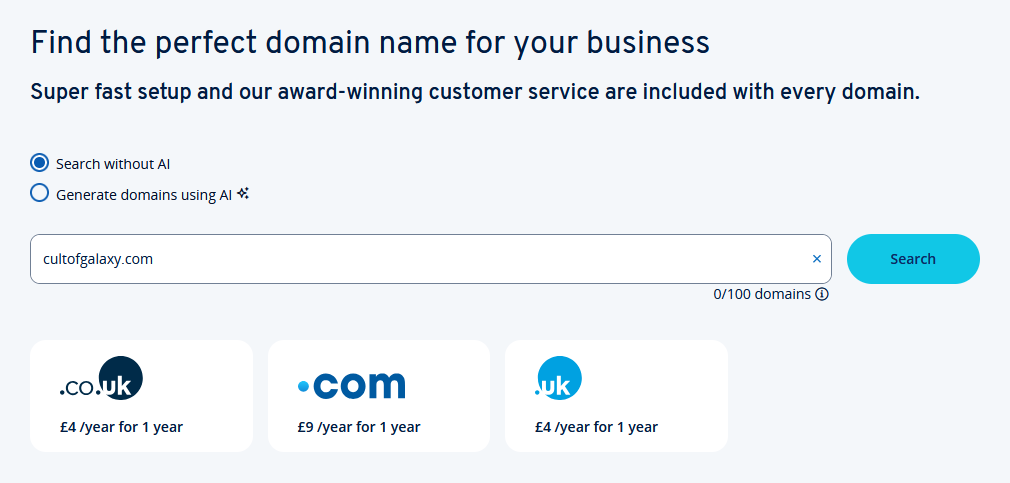
Domain names aren’t free, but fortunately they’re very affordable. There are many different domain name registrars operating for different countries, but personally, being in the United Kingdom, I use IONOS UK. It doesn’t really matter which one you choose, but you can shop around for welcome offers if you like. I suggest Googling the phrase ‘domain names’ and starting your search there!
Once you’ve found a registrar, your next step will be to choose your domain name. For the sake of this tutorial, a domain name is made up of two main parts: your own name (e.g. ‘cultofgalaxy’), and a TLD (e.g. ‘.com’). Although ‘.com’ was historically the gold-standard for TLDs, there are now many different ones to choose from, and it’s really up to you which one you pick. Newer TLDs like ‘.codes’, ‘.game’ and ‘.coffee’ give you a wider range of options allowing you to better reflect your own personality and interests.
Once you’ve found a domain name you like and which is available, make the purchase, and you’re ready to proceed to the next step. (Just make sure you pay attention to the renewal rate, as a cheap welcome offer may be masking a much-higher renewal price for your second year onwards!)
Pro tip! Once you own a domain name, assuming you have the ability to create subdomains, you can actually create as many additional handles as you like. We use @cultofgalaxy.com for our main Bluesky account, but for our personal accounts Chel and I use the handles @chel.cultofgalaxy.com and @james.cultofgalaxy.com respectively.
Step 2: Get your DNS record
Now that you’ve purchased your own domain name, the next step is to verify your ownership of that domain with Bluesky so that you can start using it as your custom user handle. Fortunately, Bluesky makes this very easy.
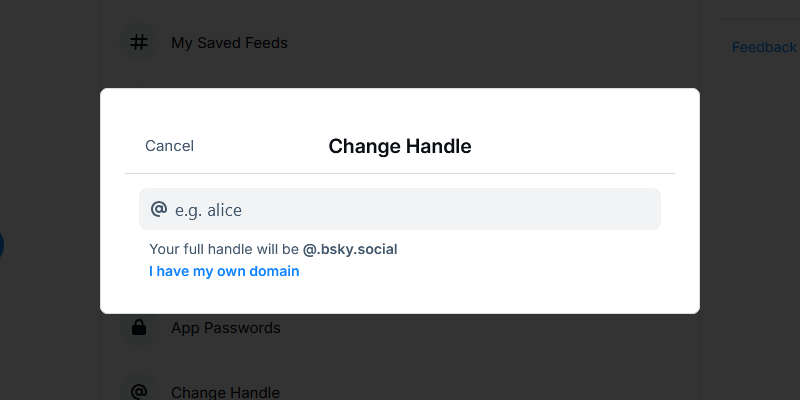
From your Bluesky account, go into your settings, and then under the ‘Advanced’ subheading, look for the option which says ‘Change Handle’.
Click this, and you should see the following popup:
From here, you need to click the ‘I have my own domain’ link.
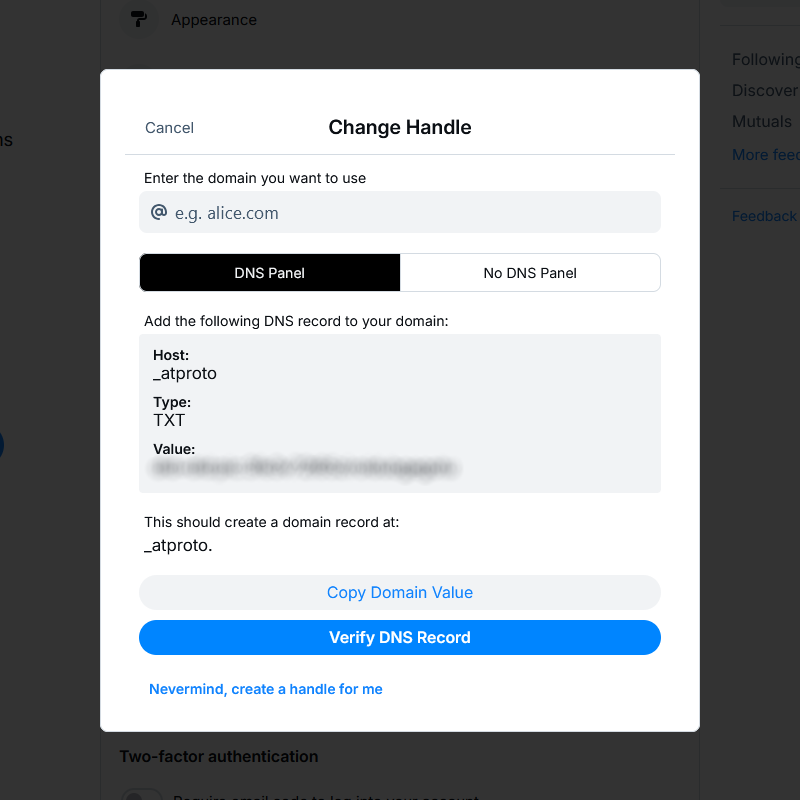
This will take you to the next part of the popup:
This next part of the popup will provide you with your unique DNS record that will verify your ownership of the domain name to Bluesky, so you can begin using it. It contains a host (‘_atproto’), a type (‘TXT’), and a value, which is unique to your Bluesky account.
Copy this to your clipboard by clicking the ‘Copy Domain Value’ button.
Step 3: Add the DNS record
Now that you’ve obtained your DNS record, the next step is to add it to your domain name’s DNS configuration.
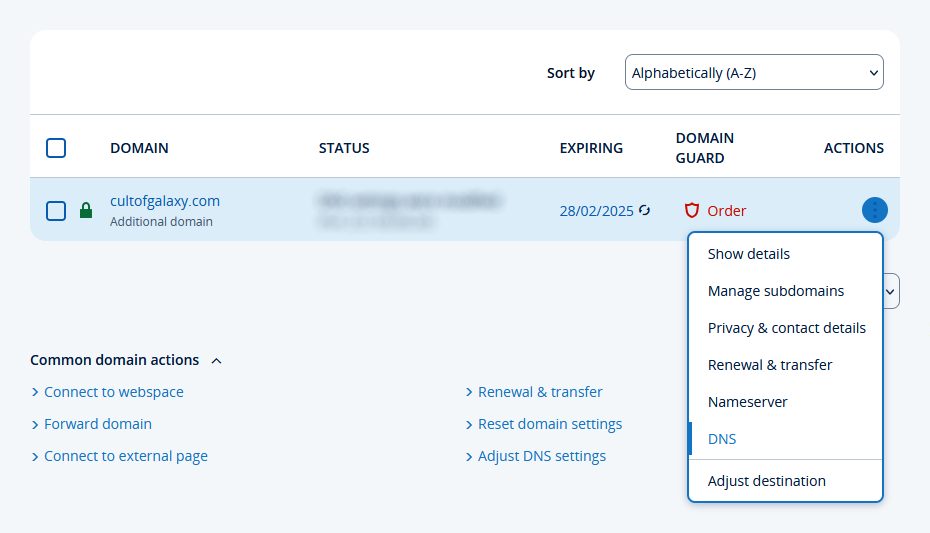
Exactly how this works will depend on your domain name registrar, but here’s how I do it on my IONOS UK account. It should generally be a similar process for all domain name registrars. (If you have any trouble, try Googling how to update the DNS settings for your particular registrar.)
Generally, you should see a ‘DNS’ option or similar for your domain name, like this:
There’s a lot you can do with a domain name’s DNS configuration, but fortunately for the sake of setting up your custom Bluesky handle you only need to worry about one thing, and that’s adding the TXT record from Bluesky to verify your ownership.
Look for a button saying ‘add record’ or similar, and click it.
When you’re prompted to select a record type, choose ‘TXT’ and continue.
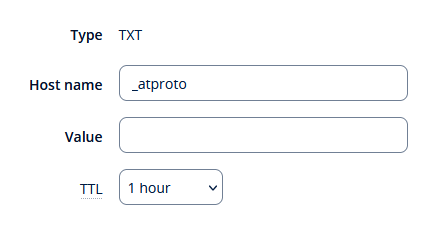
The next thing you should see is a form similar to the following:
This is where you need to enter the details that you grabbed from Bluesky. The host name will always be ‘_atproto’, but the value will be unique to your Bluesky account. If you copied it to your clipboard earlier, you can now paste it into the ‘value’ field. (If you also see a ‘TTL’ field, this can be left at its default value.)
Save the new record, and then return to Bluesky.
Picking up from where you left off earlier, ensure you have entered your domain name at the top of the form (where it says ‘enter the domain you want to use’), and then click the button that says ‘Verify DNS Record’.
Bluesky will then verify your ownership of the domain name by checking for the matching DNS record, and then once it has done this you will be able to begin using your very own domain name as a handle. If you’ve made it this far, then congratulations!
Step 4: Success
And that’s really all there is to setting up your custom Bluesky handle.
By setting up your custom handle using your own domain name, not only have you created yourself a Bluesky handle which is more distinctive and memorable, it also verifies your association with the domain name in question. Nobody but you can create handles tied to your domain name, so using custom handles in this way will help to reassure your followers that you are indeed who you say you are.
What’s more, you now have your very own domain name which you can connect to any service you like, whenever you like. You can point it at your Bluesky account, to a page you’ve created on something like Carrd, or, best of all, to your own website entirely.
But like I said – that’s another topic for another day!


